Running Autodesk EAGLE 9.6.2 on Xubuntu 22.04

So, I did a fresh install of Xubuntu 22.04 on a Dell Latitude 7390 with an Intel UHD 620 display adapter. I had some issues with the machine locking up just a few minutes after startup. I was able to resolve this by adding the following kernel option to the /etc/default/grub file.

GRUB_CMDLINE_LINUX_DEFAULT="quiet splash i915.enable_psr=0"

The resolved that issue well enough, and most everything using OpenGL (e.g. Atom, Firefox, etc.) ran just fine after that. The only thing that was giving me trouble now was EAGLE. WebEngineContext would issue an error about not being able to initialize and then the program would seg fault.

WebEngineContext used before QtWebEngine::initialize() or OpenGL context creation failed.
Failed to create OpenGL context for format QSurfaceFormat(version 2.0, options QFlags<QSurfaceFormat::FormatOption>(), depthBufferSize 24, redBufferSize -1, greenBufferSize -1, blueBufferSize -1, alphaBufferSize -1, stencilBufferSize 8, samples 0, swapBehavior QSurfaceFormat::SwapBehavior(DefaultSwapBehavior), swapInterval 1, profile  QSurfaceFormat::OpenGLContextProfile(NoProfile)) 
[5376:5376:0100/000000.883007:ERROR:broker_posix.cc(41)] Invalid node channel message
Aborted (core dumped)

After much googling, I came across a seemingly unrelated thread where they were removing some of the files from the internal lib folder to force EAGLE to use the system defaults. Since these seemed to be relevant to the error message I was getting, I decided to move the following library files into a folder named “backup” to see what would happen. Those files are shown here.

libX11-xcb.so.1
libxcb-dri2.so.0
libxcb-dri3.so.0
libxcb-glx.so.0
libxcb-present.so.0
libxcb-sync.so.1
libxcb-xfixes.so.0

After that, EAGLE actually opened. Of course, the fonts were huge on a very small 13.3″ screen. I had to go into Options -> User Interface to disable the “High DPI Scaling” option in order to get a more reasonable display.

Now, EAGLE seems to run beautifully. Fingers crossed that we can keep running Autodesk products on Linux in the future!

Portable 40m Direct-conversion Transceiver Design

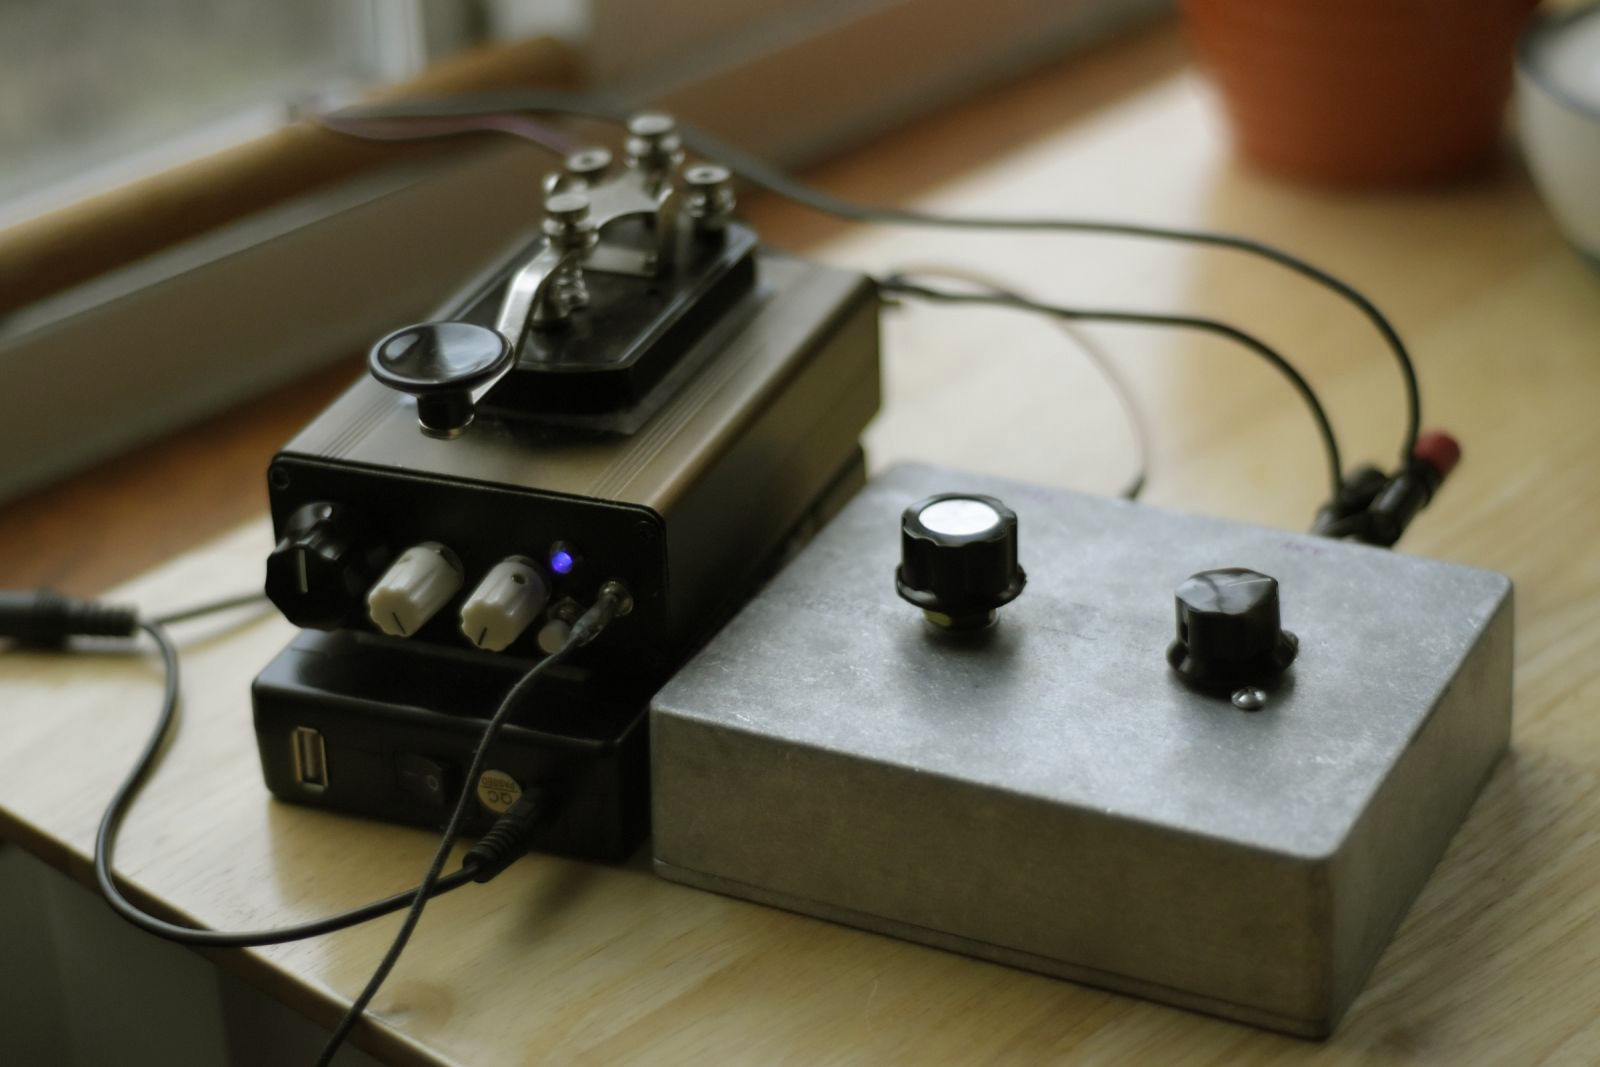
Having finished my master’s degree over a year ago now, I’ve started to see my thesis show up on various academic web sites. I decided I should probably link it on this site in the event that anyone is interested in building and/or designing their own QRP mono-band radio. Additionally, I’ve been doing some more experiments with QRP setups and like using this rig as a qualification vehicle. Being a mono-bander with a very narrow receive bandwidth, I just find it more sensitive to picking up weak signals, and it’s very easy to listen to when operating in less noisy environments. I’ve done a lot of comparisons with the KX3 (thanks to KK7B), and sometimes it’s just easier to copy signals closer to the noise floor on the DCT.

With that being said, any later posts that utilize this transceiver will point back here for reference. A full text PDF of the design is listed here:

https://www.researchgate.net/publication/346429865_Design_of_a_7-MHz_Portable_Direct_Conversion_Transceiver_with_Digitally_Controlled_Keying

73s DE K2NXF

Differential Amplifier w/ Cathode Follower

Differential Amplifier with Cathode Follower

This is a circuit designed for a classroom project whereby the instructions were to “improve” a differential amplifier circuit. The differential amplifier design is essentially an exercise in understanding the inner workings of an opamp, and it effectively works in the same way. The figure below is a schematic for the differential amplifier without the cathode follower output stage. In the LTspice simulation, the input signal is connected to the V+ terminal and the V- terminal is connected to ground. There is no feedback loop between the output and either input terminal making this a high-gain open-loop configuration. However, adding a resistor from V- to ground and one from the output terminal to V- would accomplish the same results as a non-inverting opamp.

diff_amp

I wouldn’t say that adding a cathode follower “improves” the output stage of the amp. It was more an experiment in comparing different solid-state output stages with a vacuum tube stage operating at very low voltages. However, I will say that this thing sounded amazing with the couple of guitars I tested through it. Putting a potentiometer in the feedback network allowed me to play with different gain settings. It’s a very bright sound overall giving lots of high-end sparkle, but the breakup was quite remarkable. I suspect this might be a very usable configuration for a tube mic preamp or a number of audio applications. Hopefully, I will get an opportunity to revisit this before too long.

For those of you interested in the ins and outs of this experiment, you can download our full report here.